Follow the below steps to integrate E-junkie with MailChimp.
NOTE: In order to comply with EU GDPR requirements, buyers can only be subscribed to an email list if they deliberatley choose to opt-in; see the section About Subscription Opt-ins here for further details.
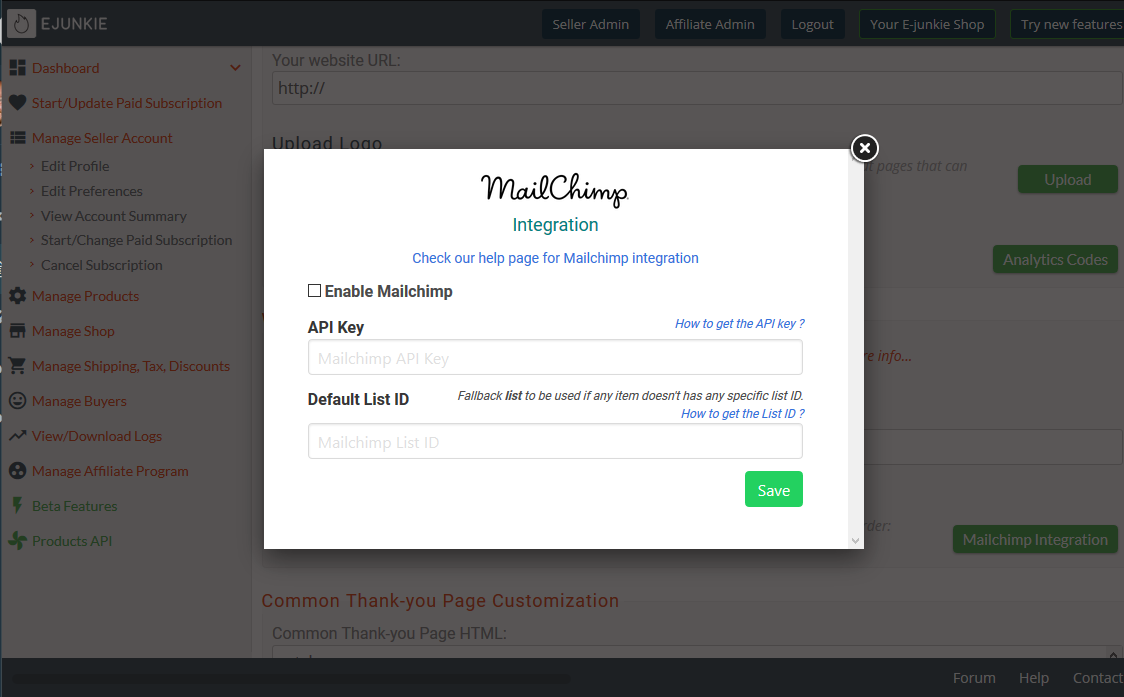
Enabling MailChimp for your E-junkie account and setting up your API Key
- Log into your E-junkie Dashboard;
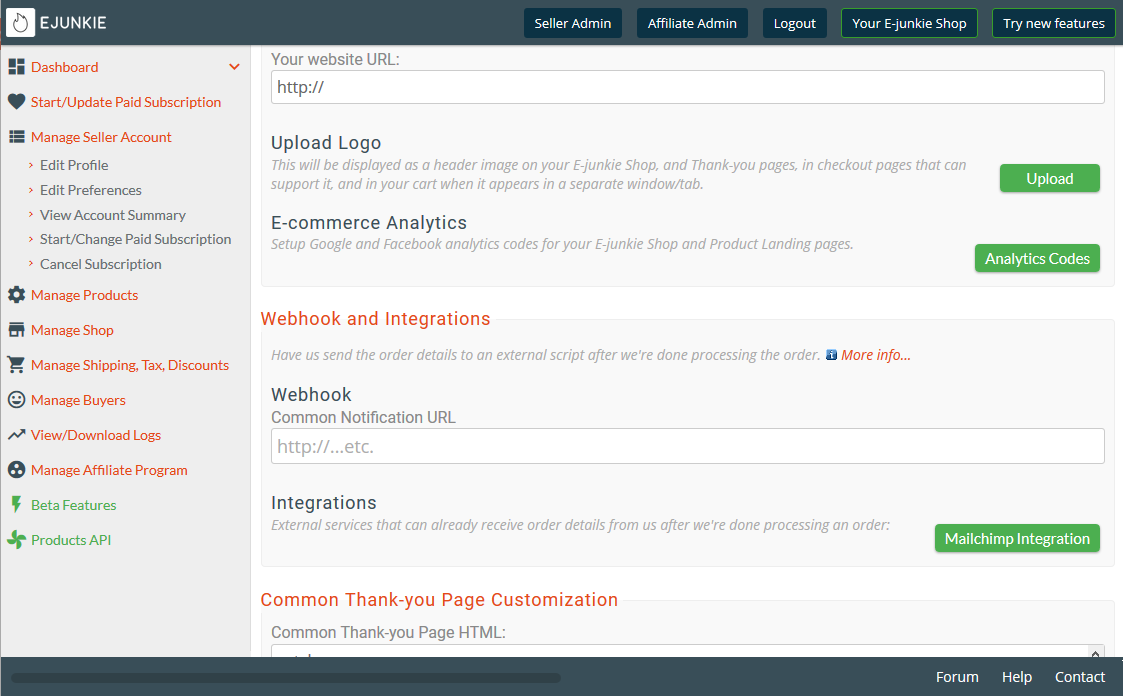
- Go to Manage Seller Account > Edit Preferences;
- Scroll down to Webhook and Integrations;
- Under Integrations, click on the MailChimp Integration button;
- Once the popup appears, open MailChimp in a new tab:
- Log into your MailChimp account;
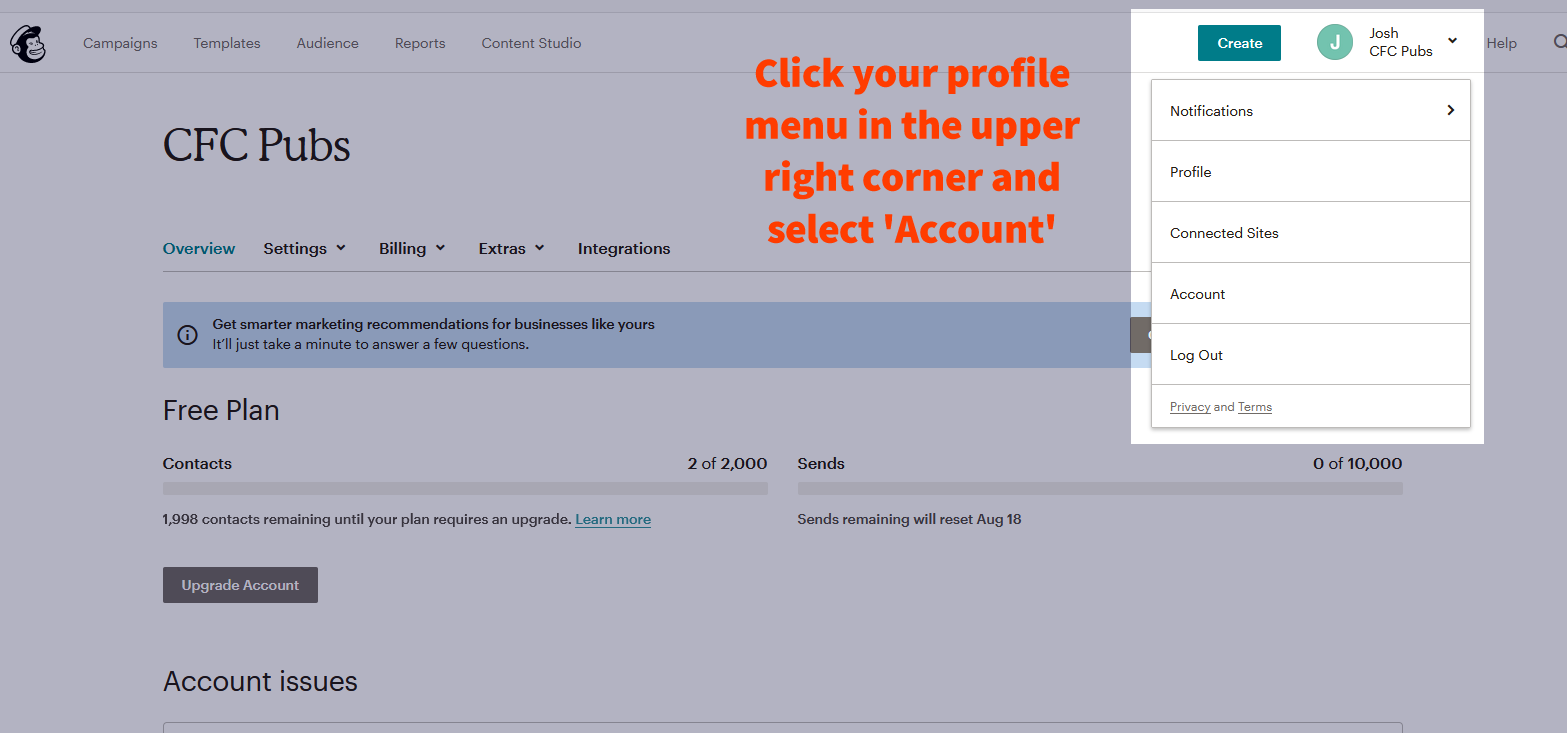
- Once you are logged in, click on your Profile Name on the top right corner and select Account from the dropdown;
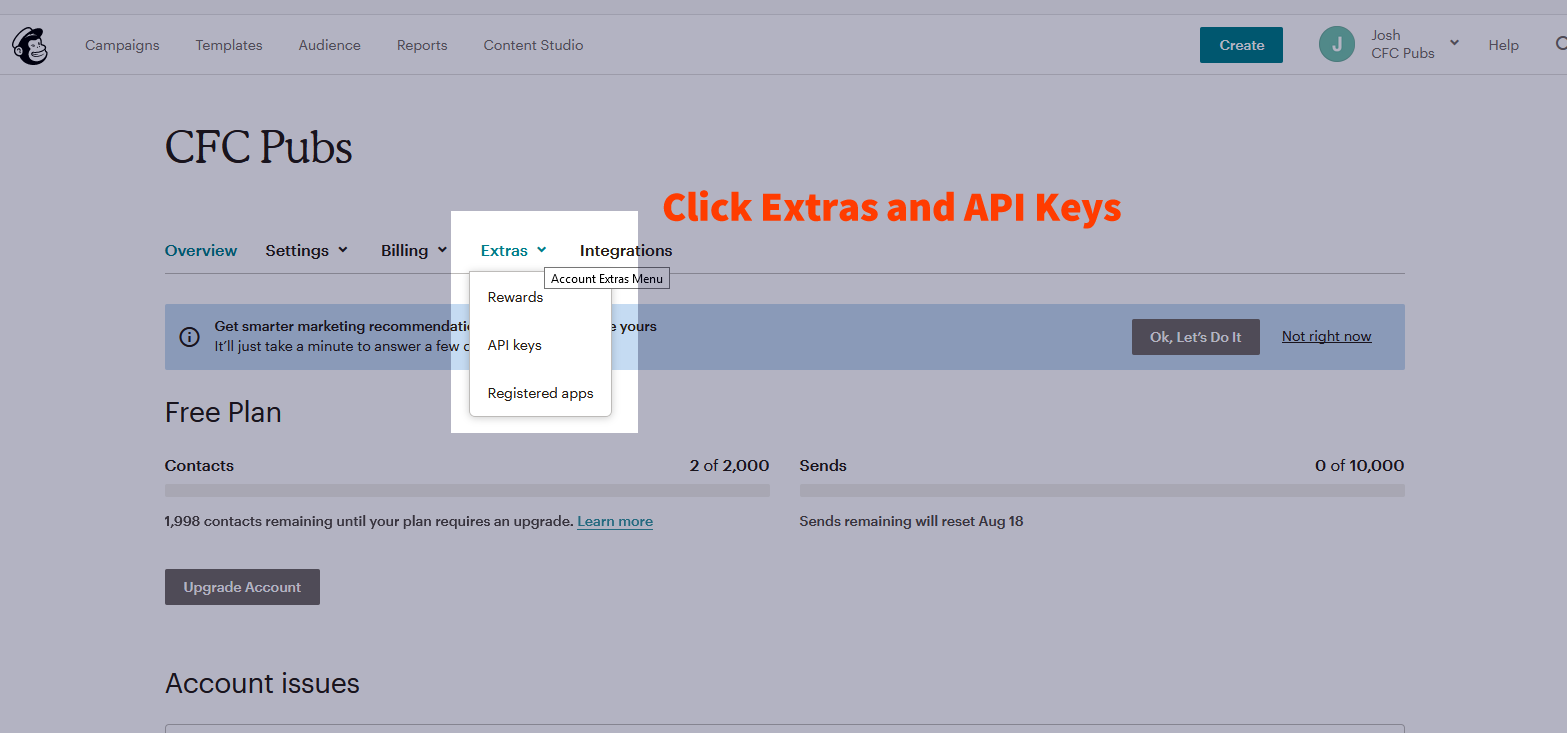
- Click the Extras tab and select API Keys from the dropdown;
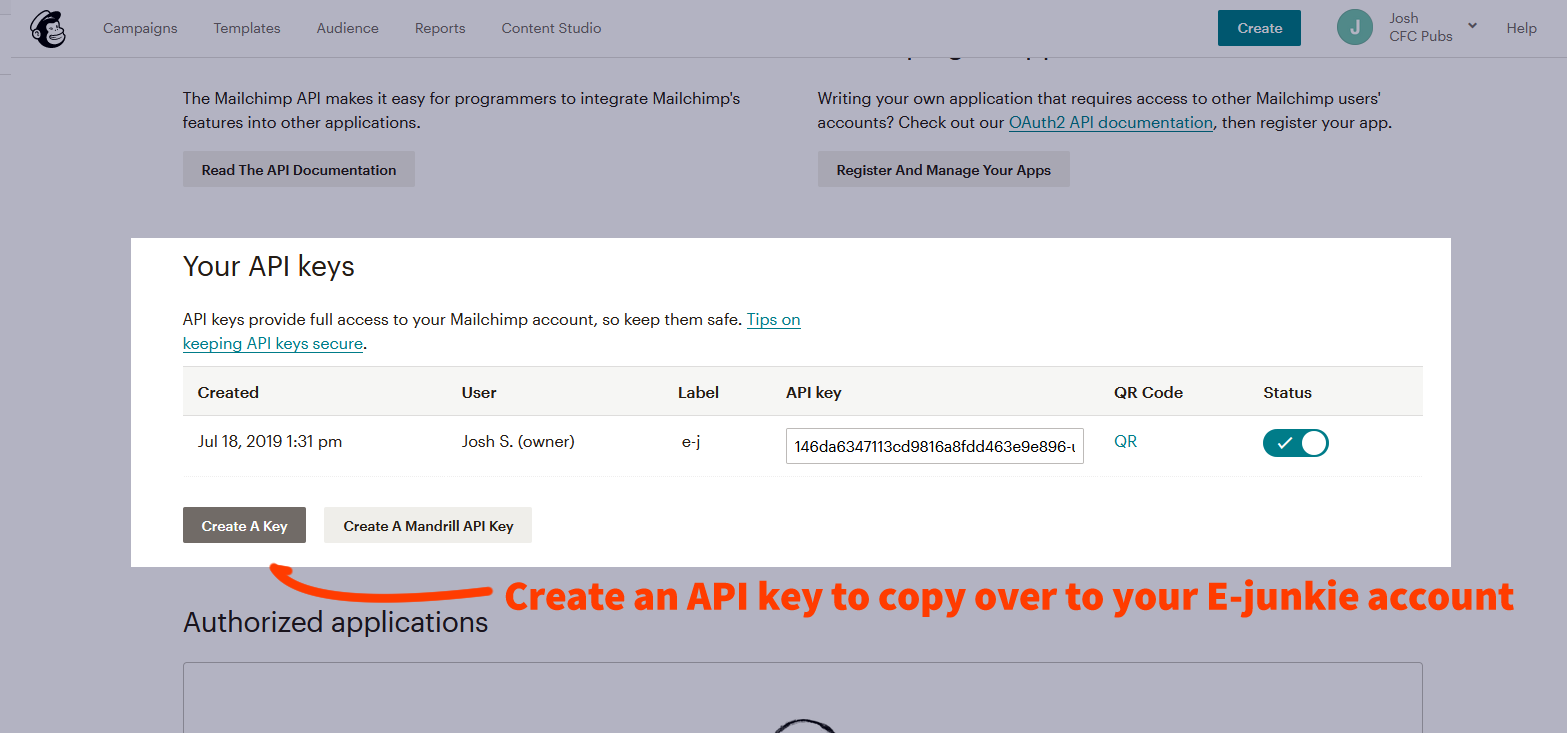
- Click the Create a Key button;
- Copy the key you created (an alphanumeric string like
1a23bc45de6f).
- Once your key is created, switch back to your E-junkie Dashboard tab;
- Tick the box to Enable MailChimp and paste the API Key that you created in your MailChimp account.
Setting up your List ID & Audience ID
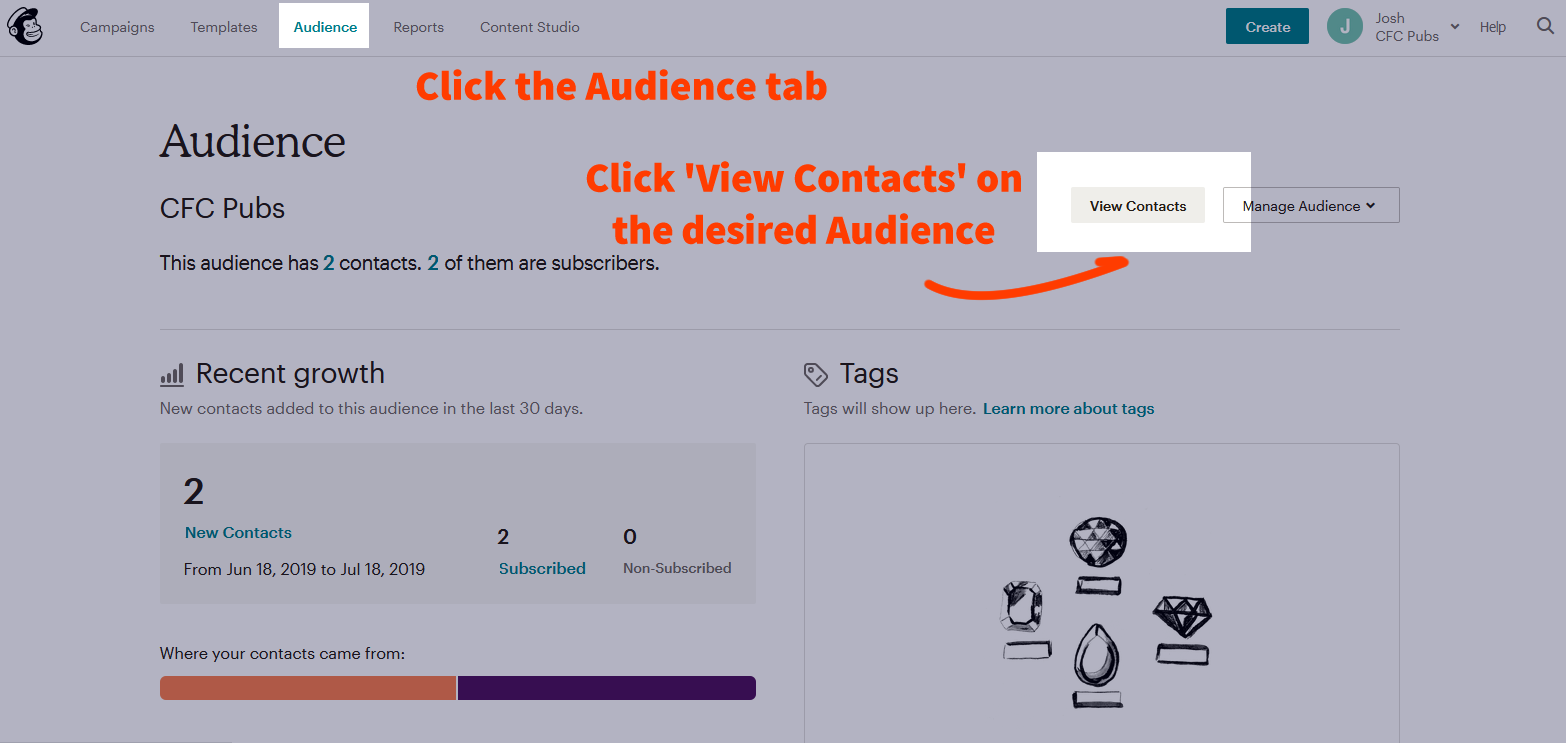
- Go to your MailChimp account;
- Click on Audience in the top navigation bar;
- Click on the Audience name you want to integrate with E-junkie, or Create Audience if you haven't set one up yet;
- Once the Audience page opens, click the View Contacts button for that Audience;
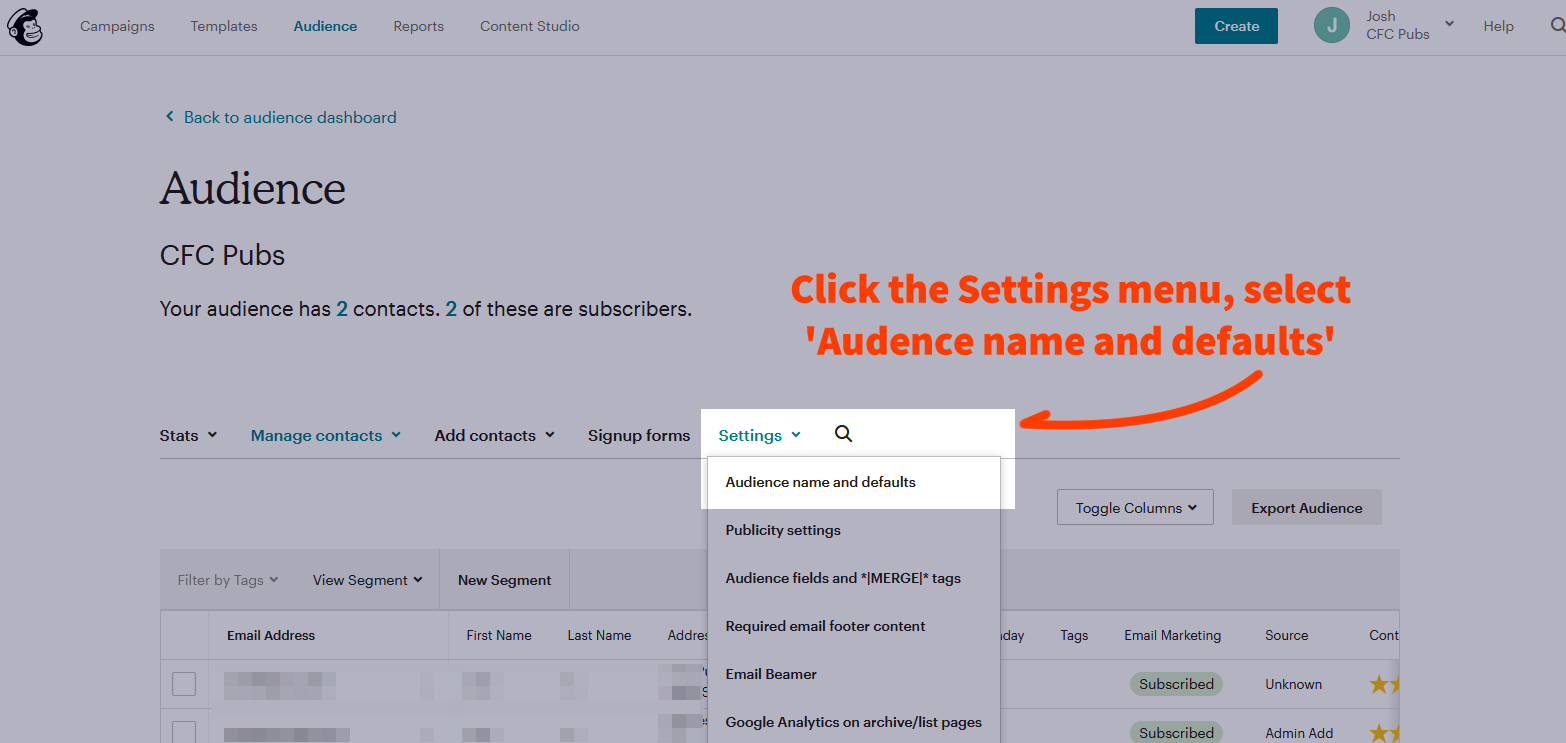
- Click on Settings and select Audience name and defaults from the dropdown menu;
- Copy the alphanumeric Audience ID string like
a1bc23d45ef6that you will find there:
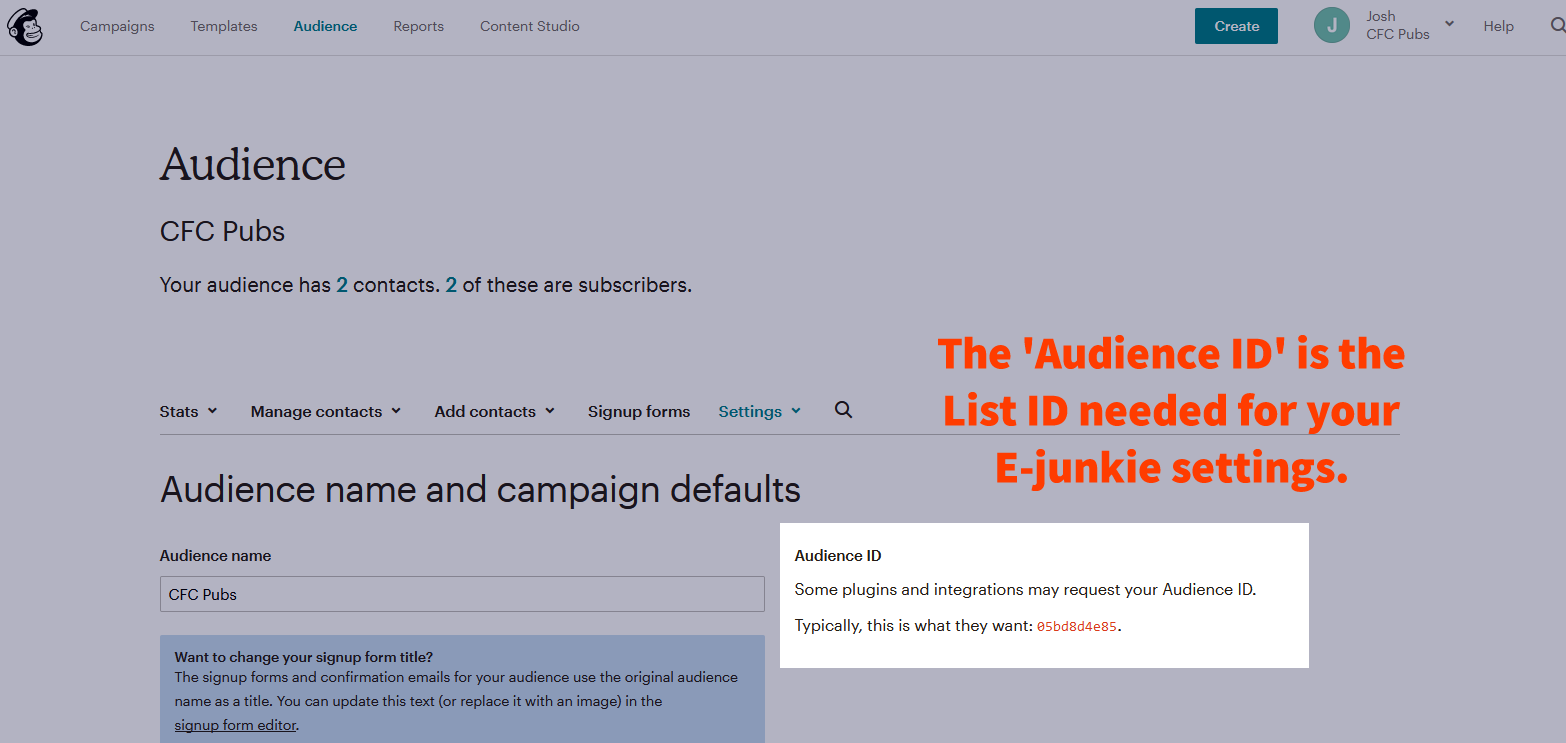
- Paste that Audience ID string into the Default List ID field in the MailChimp integration popup in E-junkie Dashboard:
- Once you have integrated a Default List ID in your E-junkie Preferences, you can also optionally integrate any individual product(s) with their own, different List ID:
- In E-junkie Dashboard go to Manage Products > Edit Products, select the product, and click View/Edit Product;
- Under Integrations, click on the MailChimp button;
- In the popup that will appear, paste the List ID for that product from your MailChimp list (as described above);
- Click Submit to apply changes.
See Also