How to setup your E-junkie Shop
E-junkie Marketplace Shops & Product Pages
If you don't have a Web site of your own or don't want to sell directly from your site, E-junkie can generate an online Shop page for you. See our example Shop here.
Product Pages are a ready-made sales page you can use even without having an E-junkie Shop or a site of your own. Product Pages use the same product sales-page details as the product's page in your Shop, but you can set up those details for a Product Page without also having to list the product in your Shop.
Bear in mind the E-junkie Marketplace is not a major shopping destination like eBay or Amazon, so there are not many buyers browsing our Marketplace looking for items to purchase; however, adding a Shop page on our site allows for search engines like Google to find your products, if you don't have a site of your own for them to look up instead, and provides you with a link where your own marketing can send buyers to learn more about and purchase your products.
How to add/edit product details for your E-junkie Shop & Product Pages:
- If you have not yet added the product in your E-junkie Dashboard:
- Go to Manage Products > Add Product;
- Our Getting Started Guide is a good overview of what to do there;
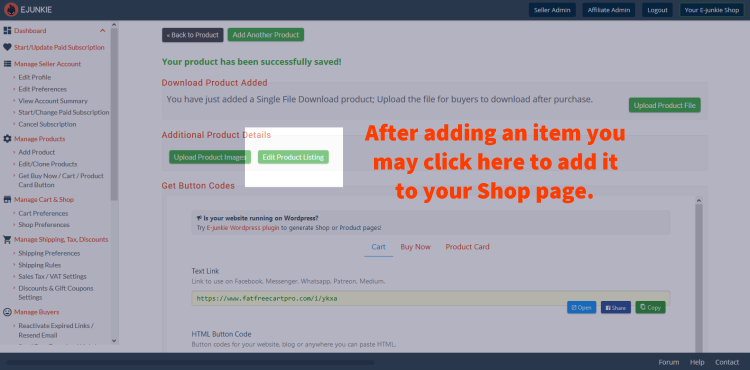
- Once you click Submit for the new product, you will find an Edit Product Page button you can click to set up your Shop page for that product:
- To add/edit your Product Page for an existing product:
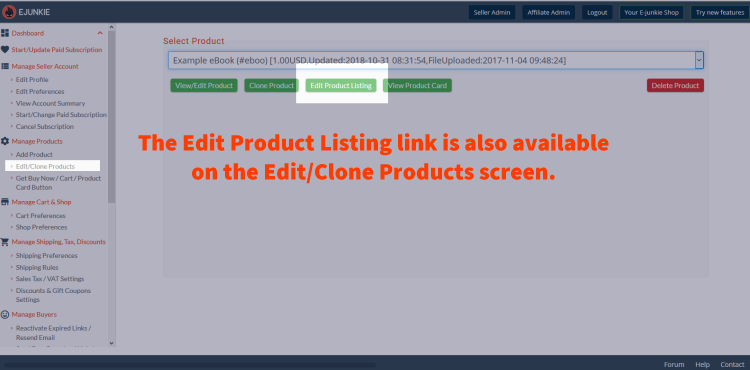
- Go to Manage Products > View/Edit Products;
- Select your product in the menu;
- Press the Edit Product Page button:
- Enter the Product Details (detailed description, promotional text, etc.):
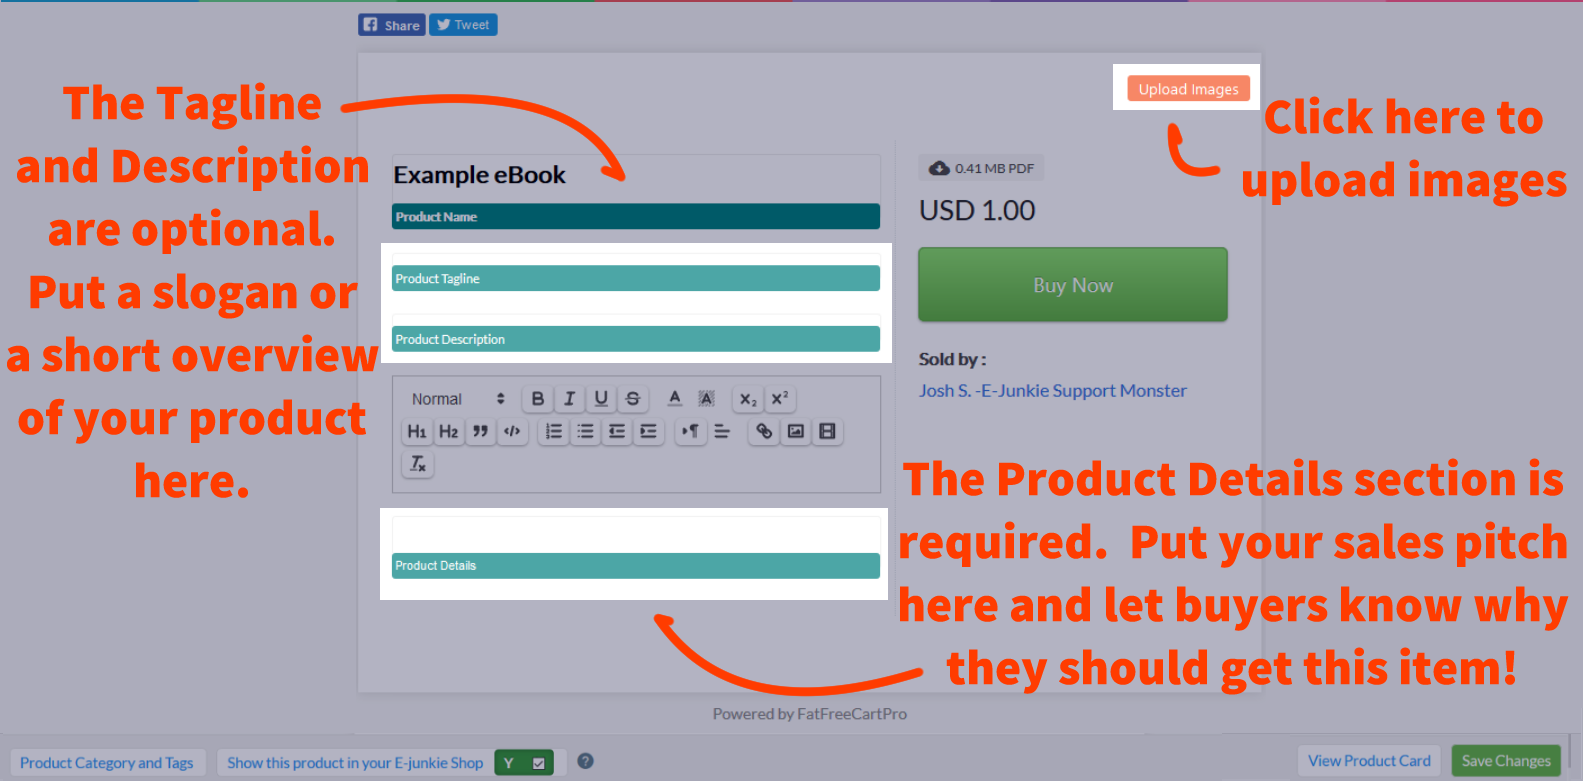
- Optional: Enter a Product Tagline (e.g., a brief slogan like "Solves all your image editing needs!");
- Optional: Product Description (a short summary of your product);
- Optional: Click on the product-image placeholder to upload images:
- JPEG, JPG or PNG files allowed, maximum file size is 3MB;
- Any images uploaded in your main product settings will also appear here;
- For best results, we'd advise uploading images pre-sized to 800px wide × 640px tall;
- Product image thumbnails shown on your main Shop page will be scaled and cropped to fill the thumbnail box with a 5:4 aspect ratio;
- For portrait-oriented images you don't want cropped to fit the thumbnail, you could reisze your original image to 640px tall, then add enough blank margin at each side to fill out an 800px width.
- In the bottom footer, you can tick Show this product in your E-junkie Shop to have the item appear in your Shop in our site's Marketplace:
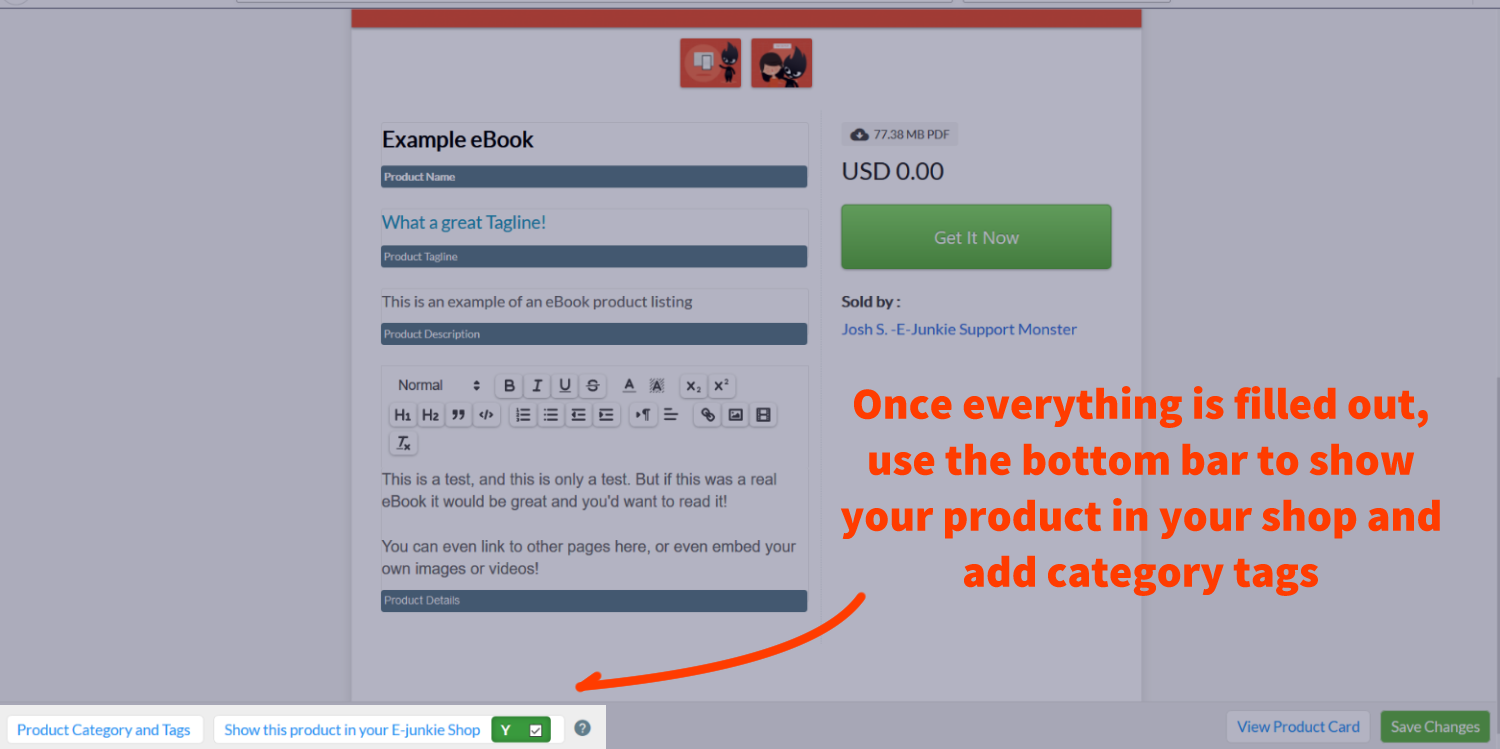
Note that box to Show this product... will appear set to Yes the first time you load this screen for a new product, but that won't take effect until you click the Save Changes button. You can leave this unticked if you're only using Product Page links to sell your product and don't also want a hosted Shop in our site's Marketplace.
- Also in the bottom footer, click the button labelled Product Category & Tags; this opens a panel that controls what searchable tags will apply to your products:
- Select a main Marketplace Category for your product;
- Type up to 5 Shop Tags describing your product—e.g., for an ebook about transcribing legal documents as a home-based business, you might enter:
ebooks
work from home
data entry
transcription
legal
Your main Shop page will only list the tags entered in the Tag 1 field for all products in your Shop, so you might think of Tag 1 as defining "departments" for your Shop. Clicking any one of those main tags will then list all products with that tag, along with all other tags assigned to those products. Tags will be listed in order by the sales volume of product(s) which have that tag. - Optional: Enter a Details URL if you have a page on your Web site with more information about the product;
- Optional: Enter a Demo Download URL if you offer a free demo download for the product, such as a trial version of your software or an MP3 snippet, enter the URL of that demo file here;
- click Save Changes and then close this panel.
- Click Save Changes and then close this panel;
- From here you can return to the View/Edit Products screen and repeat the above steps for any other products you want to list in your E-junkie Shop page;
- Once you start your paid subscription with us, items in your E-junkie Shop (and optionally your affiliate program as well) will also be available for search in our online Marketplace listing all products in all our subscribers' Shops.
NOTE: Our Shops server can take a few minutes to pick up any changes to your Product Page settings, so you can be patient in waiting for those changes to take effect, or go to Manage Shop & Discounts > Refresh E-junkie Shop to skip this wait and force an immediate sync of new settings to your Shop.
Customize your E-junkie Marketplace Shop
- When you are ready, go to Manage Shop & Discounts > Shop Preferences to customize your Shop further.
- Your default Shop URL will be:
https://XXXXXX.e-junkie.com/
...whereXXXXXXis your E-junkie Client ID number, which you can find in your E-junkie Dashboard under Manage Seller Account > Account Summary.- This version of your Shop URL will always work, and it auto-redirects to any custom Shop URL you may currently have set up (see next point below);
- Optional: You can give your Shop URL a custom name instead—e.g.:
https://yournamehere.e-junkie.com/
- Show Related Products: When viewing a Product Page, also display other products with similar Tags assigned;
- Optional: By Shop Banner, click the Upload Banner button to provide a custom banner image to appear at the top of your Shop pages;
- Optional: By Header/Footer Links, click the Add/Edit Links button to specify extra links you want added to your Shop header or footer;
- Products are normally listed in your Shop from oldest to newest by default. If you want to rearrange the order in which products appear listed in your Shop, you can choose to Pin Up products to move them to the top of the list, or Pin Down products to move them to the end, or just Hide any products from your Shop entirely; pinned products will be listed in the order by which you Pin them.


NOTE: Our Shops server can take some time to pick up changes to your Shop Preferences, so be patient in waiting for changes to take effect in your live Shop. Until these changes sync over, the Shop Preferences screen will show the settings that are currently live in your shop, which may not reflect your last saved changes there. This can make it appear that your changes reverted or weren't saved, when in fact you just need to wait for those latest changes to sync over to your Shop, so don't let that throw you off. Wait an hour or so after you Save Changes, then reload your Shop in your browser to see if your changes have taken effect, then you can reload your Shop Preferences to make further changes.